3D Environment Artist
The Black Garden

This solo environment project was created in Unreal Engine 5 over approximately two months. Every asset and element in this scene apart from the grass and flowers was independently created by me.


In designing this environment, my goal was to create a blend between machine and nature, seamlessly blending organic and industrial elements to create a compelling and contrasting visual dynamic. Many surface textures utilize world-aligned texture mapping, an approach that I felt was well-suited for the cubic architectural forms in the scene.
This project provided me with the opportunity to refine my expertise in world-aligned materials, vertex painting, and advanced texture and material creation techniques.
Below is the original concept for the environment, created by Jesse Van Dijk:

Concept Alignment
To try and match my environment with the reference as closely as possible, I created a postprocess material in unreal engine that was able to project a reference image over the camera, allowing me to align the elements in the scene with the elements in the reference.
Here is a preview of how it works:

Texture Creation Process
Given the architectural simplicity of the structures in the environment, I knew I had to focus on creating highly intricate surface textures to create visual interest to the otherwise basic and simplistic architectural forms. Developing these materials required extensive experimentation to determine the most effective approach. Initially, I planned on creating these materials entirely within Substance Designer. However, I quickly realized that achieving the desired complexity of the hard-surface shapes was going to be extremely time-consuming and challenging.
As a result, I decided to go with a different approach; I pivoted to modeling the details in Maya. This gave me better control over the intricate hard-surface details and allowed me to create them more quickly and efficiently than I would've been able to had I made the textures 100% in Substance Designer. Throughout the modeling process, I made sure everything remained tileable. Once the base models were completed in Maya, I imported them into ZBrush to generate smoothed high-poly versions with subtle tertiary details, such as dents and scratches.
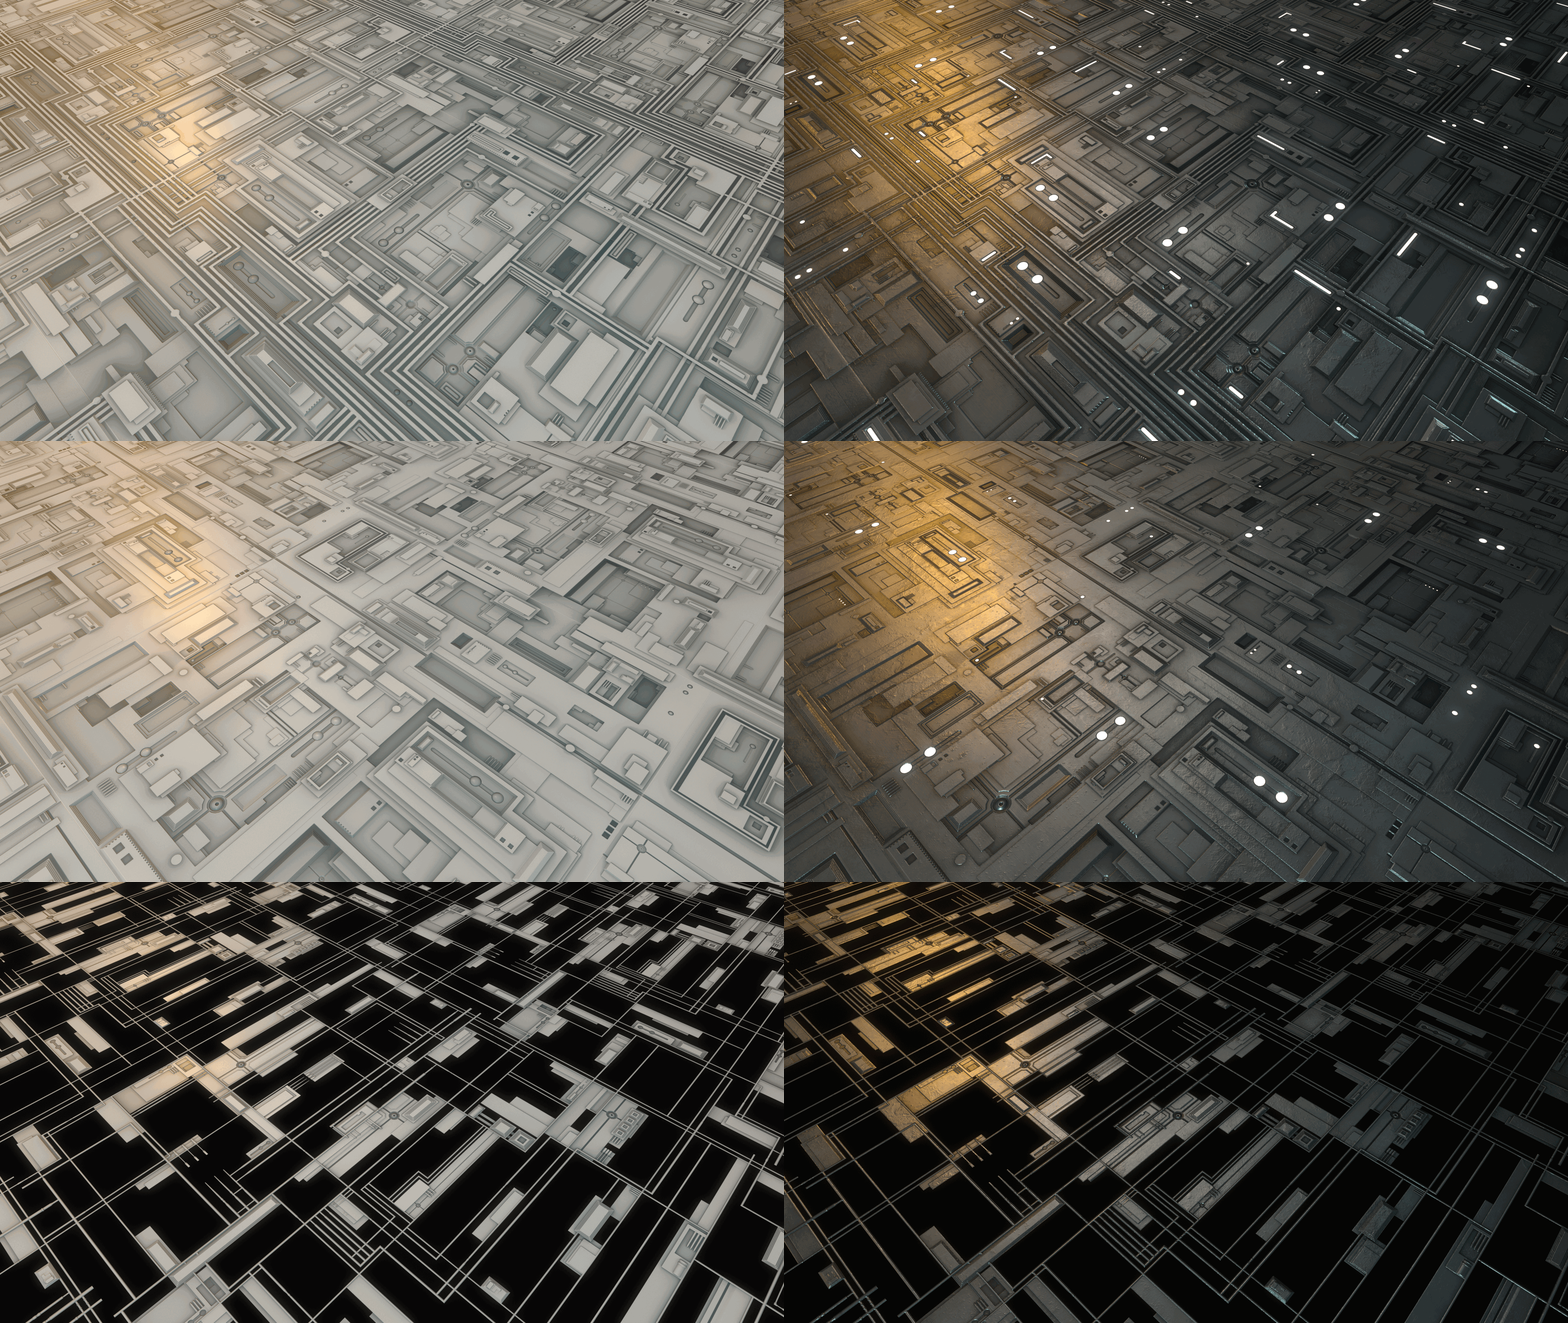
This high-poly model was then baked onto a flat plane to produce a height, ambient occlusion, and curvature map. Using these foundational maps, I worked on completing the rest of the material in Substance Designer where I added color, roughness, additional normal details, and alpha and/or emissive maps depending on the material variation.
Below are screenshots taken directly inside Maya of each of the four materials I created along with a screenshot of the final material graph inside Substance Designer.


Material Setup Inside Unreal Engine
In Unreal Engine, I developed an advanced material designed for flexibility and variation. The material included controls for UV tiling, offset, and rotation, along with the option for world-aligned texture mapping, making it highly efficient for scene texturing—especially for the many cubic surfaces within the environment.
To enhance the realism of the materials, I created a height-based linear interpolation vertex paint system combined with a grunge texture parameter, allowing for adjustable moss or dirt accumulation in crevices to create a natural, overgrown effect.
For further customization, I added basic controls for things like color saturation, color brightness, color overlay, normal intensity, roughness intensity, emissive intensity/color, and ambient occlusion power, giving me precise control over the material's final appearance.


Final Materials


Additional Materials
For some of the moss, I wanted to have manual control over its growth, so I created a material that allowed for vertex painting in the opacity channel. This let me manually add or remove moss growth in specific areas.

In addition, I created an edge damage decal material to project surface wear onto object corners, enhancing the character, storytelling, and variation of some of the cubic shapes in the scene.

This project significantly improved my understanding of advanced texture and material creation. The materials I developed for this environment were by far the most complex I’ve created to date, pushing me to explore new workflows and creative approaches. One of the most valuable lessons I learned was the power of layering different materials to add depth, visual interest, and complexity to an object’s surface.
Upon reflection, one area that could've used improvement was the overall cleanliness and uniformity of the surfaces. Adding more variation—especially in color and roughness values— I think would have enhanced the visual richness of the surfaces a lot. While I did incorporate layered grunge and grime effects, the scene would have benefited from a stronger emphasis on dirt buildup, wear, and tertiary details to increase realism. These additions I think would have significantly improved the believability and overall quality of the environment.
In the future, I plan to push layered details even more to increase immersion and believability in my environments. Despite some aspects falling short, I think this project was overall successful. I learned a lot in a short amount of time and I'm happy with what I was able to achieve under a tight deadline.